Macbook Pro Setup
Prior to Start Date
- Accounts (complete before your start date)
- Ensure you have completed Create Accounts
- Install Okta Verify and Microsoft Teams on your mobile phone
- Okta URL: https://ecfmg.okta.com
Prerequisites (On Start Date)
⚠️ WARNING: DO NOT PERFORM STEPS OUT OF ORDER
WE PERFORM THESE STEPS AS A TEAM. DO NOT DO THEM INDEPENDENTLY
Wait to perform any of the steps until on a teams call with the connected apps team (message them first)
- Message Seven Thomas (or Patrick Gidich if unavailable) on Teams when ready
General Notes
- Patience
- Some parts will be boring or frustrating, but consistency across the team matters
- You will receive your username and temporary password on your start date
💡 If you have issues, contact Seven Thomas or Patrick Gidich first
-
📞 484-431-4487 (Patrick)
-
📞 980-259-3376 (Seven)
They may direct you to the Intealth Help Desk:
📞 215-823-2163
📧 servicedesk@intealth.org
Register Password Reset
Register your ability to reset your password here (from your personal laptop)
-
Register the password reset verification method for a work or school account - Microsoft Support
- Register to Reset Password (Use your personal device to follow this link, or incognito/private browsing mode in your browser for this to work)
- Suggestion - add Phone as secondary login method
- Note: Your username is your full email address jdoe@intealth.org
- Username = full email (e.g., jdoe@intealth.org)
-
Later if needed - you will be able to reset your password here:
Password Requirements
-
Password must be changed every 6 months
-
PASSWORDS CANNOT BE CHANGED MULTIPLE TIMES IN ONE DAY
-
Passwords must be at least 12 characters long
-
Passwords should contain letters and numbers
-
Cannot:
- contain
* - start with a number
- contain
-
New password must be unique in characters and words from previously used password(s)
- Not Acceptable: Old: Password123, New: Password12345
- Acceptable: Old: OrionStar, New: LemonTrain
-
No character sequences or repetitions
- Not Acceptable: Password12345 or PasswordAAAA
- Acceptable: $n0wC@ctu$
-
Limitations will be placed on certain key words that contextually relate to you
-
Passwords cannot contain context specific words, relating to the Enterprise or you personally
- Not Acceptable: ECFMGstarEmployee, FredWilmaPebbles979902, 123MainSt, SpotTheDog, and PhillyPhanatic13
- Acceptable: CabinFishFood
-
Common words or passwords may not be used as passwords
- Not Acceptable: variations of the word password (p@ssword, password123)
-
Known compromised passwords will not be permitted.
- Any passwords found in known data breaches may not be used.
1 - Start Up and Sign In
-
Plug-in to power supply
-
Start-up New Macbook Pro:
- Language: Choose English
- Region: Choose United States
- Transfer Your Data to This Mac: Choose Setup as new
- Accessibility: Choose Not Now
- WiFi:
<Set to your wifi> - Data & Privacy:
<continue>
-
Create computer account:
- Full Name: first + last name
- Account Name: first name (this will be your username)
- Password:
<generate from 1password>
-
Sign in with Apple ID
<use personal apple id>- Verification Code
- Terms & Conditions:
<accept>
-
You may be presented with the following options:
i. iCloud Keychain - choose setup later
ii. Make this your new Mac (if presented with this option)
1. Click Continue
2. FileVault Disk Encryption:
a. Turn on FileVault Disk Encryption:
<keep checked>b. Allow my iCloud account to unlock my disk:
<keep checked>c. Click Continue
3. Touch ID:
<perform this now>4. Apple Pay:
<continue without setting up>iii. Choose your look / Light Dark theme -
<whatever you want>
1-B - Install Software Updates
-
Command+Space -> type & select "System Settings", General -> Software Update
a. Update now
1-C If you happened to have skipped sign-in with your Apple ID earlier - add it now
- Command+Space -> type & select "System Settings" - Choose Sign in with Apple ID
(you created this earlier or using your existing personal AppleID)
2 - Partition Drive & Base Folder Structure:
-
Launch Disk Utility
a. (Command+Space => type & select "Disk Utility")
-
Add new volume (this is where your code will go) Click plus in header
a. Name: files
b. Format: APFS
c. Create Base Folder Structure
i. Launch Finder (Command+Space => type & select "Finder")
1. Command+Shift+G type
/Volumes/filespress return2. Command+Shift+N to create folders, add
a. applications (where you'd install MuleSoft)
b. cloud-files (where you'll mount OneDrive)
c. src (where your code goes)
i. Drag src to Favorites in sidebar
d. vm-images (where your Parallels VMs would go)
d. In the top menu -> Finder -> Settings -> Sidebar
i. Under Locations, ensure Hard Disks is checked
3 - Install Chrome / Office / OneDrive / Git
- Launch Safari
a. Navigate to: https://www.google.com/chrome/
b. Install Chrome
(Safari is a good browser on a Mac, but the Chrome Dev tools is great Bing too if you feel like trying it out)
- Install Your Password Manager (if using 1Password, ensure you have you master key)
a. Desktop: https://1password.com/downloads/mac/
b. Browser: https://1password.com/downloads/browser-extension
- Install Microsoft Office Suite (sign in with Intealth/ECFMG Credentials)
b. When prompted choose to install for all users
c. When prompted to mount OneDrive - mount to
/volumes/files/cloud-files
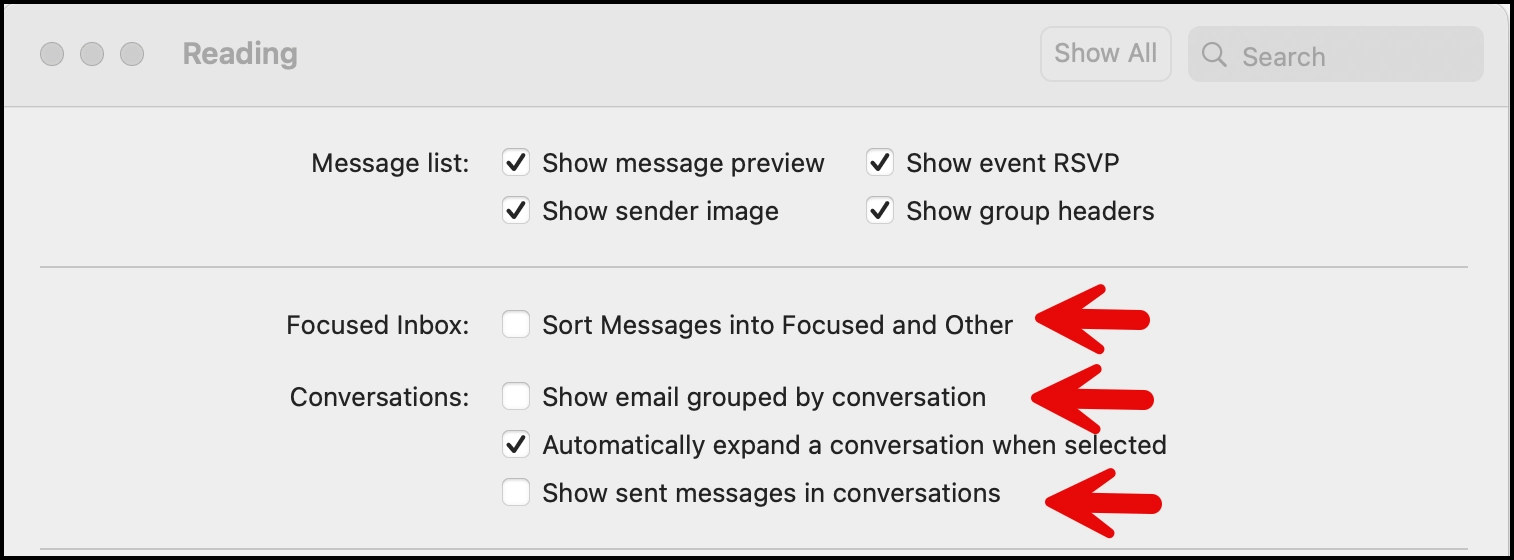
d. Configure Outlook ensure Outlook Settings do use focused inbox:
(uncheck the items noted below) (command-comma brings up settings window)
e. You may also want to configure the "compact" density preference under "general" in Outlook settings
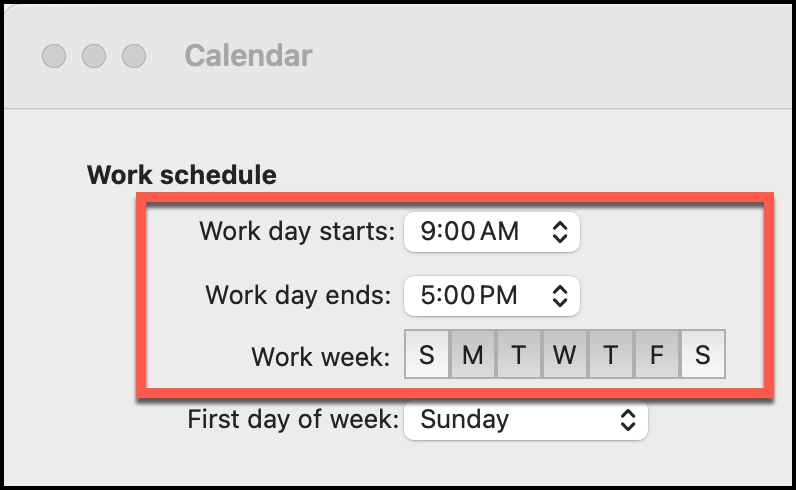
f. Configure Outlook’s working hours to match your normal 7hr+1h lunch schedule
- Install Microsoft Teams (skip if installed with Microsoft Office)
a. https://www.microsoft.com/en-us/microsoft-teams/download-app (now apple optimized)
b. ONLY if install goes sideways
i. From command prompt
1.
sudo pkgutil --forget com.microsoft.teams2. rm -r ~/Library/Application\ Support/Microsoft/Teams
3. install daily build of teams:
a. raw.githubusercontent.com/ltzLevvie/MicrosoftTeams-msinternal/master/defconfig
ii. reinstall teams
- Message the Team using the group chat called “CXA Team” and let the team know your GitHub Account handle.
4 - Install Git / Node / Runtime / Java
1. Install Apple Developer Command Line Tools (this will install GIT)
a. Launch Terminal (command+space type Terminal), run following command (this takes a long time)
xcode-select --install
b. When prompted install command line tools
c. In terminal try checking for an update
softwareupdate --list
softwareupdate --install --all
d. Open System Settings, search for Software Update and check to see if the command line tools need to be updated
2. Add GitHub SSH Keys
a. Follow the instructions below very carefully (note your MacOS version is greater than 10.12)
ii. you should add a passphrase when generating the key
iii. Do not follow the step for Generating a new SSH key for a hardware security key
b. (skip this step unless directed otherwise) To support both AzureDevOps and GitHub
i. Follow instructions for GitHub Above
ii. Add another SSH key using the RSA method - add to keychain (don't use the .pub extension)
iii. Edit the SSH Config using the hostname github.com for GitHub (if instructed also dev.azure.com for Azure DevOps (be sure to leave off the .pub extension))
iv. Use the pb-copy command for the key (with the .pub extension) and put into azure credentials (azure doesn't support the newer more secure SSH approach that GitHub requires)
3. Associate your @intealth.org email account to your GitHub Profile and validate your email
a. https://github.com/settings/emails
b. (note you can add your corporate email to your personal GitHub account - it's a blended account)
4. Add your Git name/email (from Terminal)
a. Launch Terminal - run the following commands (replace highlighted sections with your name/email) - this email should be configured in your GitHub verified emails (it can be either your personal or @intealth.org email)
git config --global user.name "John Doe"
git config --global user.email johndoe@example.com
5. Install MISE
a. Install Homebrew (link)
i. Will require machine password
⚠️ IMPORTANT: Be sure to follow instructions at end of installing which prompts you to copy and paste 3 commands into the terminal and run them
b. Install MISE
i. Launch new Terminal window - run following commands:
brew update && brew install mise
ii. Activate MISE in your shell
touch ~/.zshrc
echo 'eval "$(mise activate zsh)"' >> ~/.zshrc
source ~/.zshrc
⚠️ TROUBLESHOOTING: If MISE says it does not have permission:
mise trust
⚠️ 6. SKIP THIS STEP - Keeping instructions only if MISE has issues
Install NVM
a. Launch Terminal - run the following command
touch ~/.zshrc
b. Run the install script copied from here:
i. https://github.com/nvm-sh/nvm#install--update-script
c. Quit and restart terminal once completed
d. Install the Node with the latest version supported by Azure Functions (currently v20.x)
i. More details on status of newer versions can be referenced here.
ii. Launch Terminal - run the following command
nvm install v22
7. Install the latest .NET Runtime - MacOS ARM-64
• Select the version marked as (latest) / Long Term Support from here:
https://dotnet.microsoft.com/en-us/download/dotnet/
• Then find the section labeled .NET Runtime
• Choose the MacOS → ARM-64 version (Installers)
• Download and run it, then reboot
• Confirm Installation
○ Launch a new Terminal - run the following commands:
dotnet --list-runtimes
8. Install Java
a. Visit Adoptium (the source for open source and free version of Java)
https://adoptium.net/temurin/releases/
b. Scroll down page to Select:
i. Operating System: macOS
ii. Architecture: aarch64
iii. Package Type: JRE (java runtime environment, don't need software development kit)
iv. Version:
<leave default>v. Download the PKG file (about 56mb download), and run it, then reboot
c. Confirm Installation
• Launch Terminal - run the following command:
java --version
5 - Install VSCode / Azure Tools
1. Install Azure Functions Core Tools v4
a. Launch new Terminal window - run following commands:
brew tap azure/functions
brew install azure-functions-core-tools@4
2. Install VSCode (link)
Choose Apple Silicon (zip) not INTEL and copy the file within the zip archive to Applications
3. Install Azure CLI (link)
a. Launch new Terminal window - run the following command:
brew update && brew install azure-cli
4. Launch VS Code
6 - Install and configure extensions for VSCode
-
GitHub Copilot (can use pre-release version - should already be installed)
-
GitHub Copilot Chat (should already be installed)
-
GitHub Pull Requests
-
Azure Tools
-
SonarQube for IDE (trust publisher)
a. Java Home
Path to JRE (Java Runtime Environment)
Paste the following URL to access the settings:
vscode://settings/sonarlint.ls.javaHome
Example of value you should use: (note you need to ensure version is correct in path)
/Library/Java/JavaVirtualMachines/temurin-25.jre/Contents/Home
b. Path to Node Executable
Paste the following URL to access the settings:
vscode://settings/sonarlint.pathToNodeExecutable
Can get proper location by typing the following in a terminal prompt:
which node
Example of value you should use: (note you need to ensure username and version is correct in path)
/Users/patrick/.nvm/versions/node/v22.21.1/bin/node
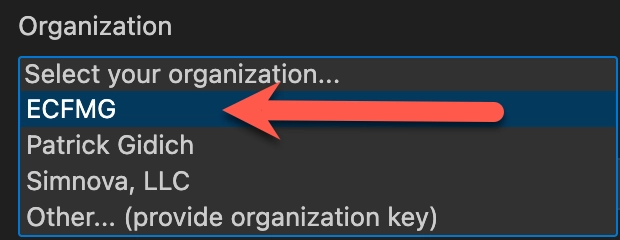
c. Add organization key to SonarQube Cloud settings for organization ECFMG
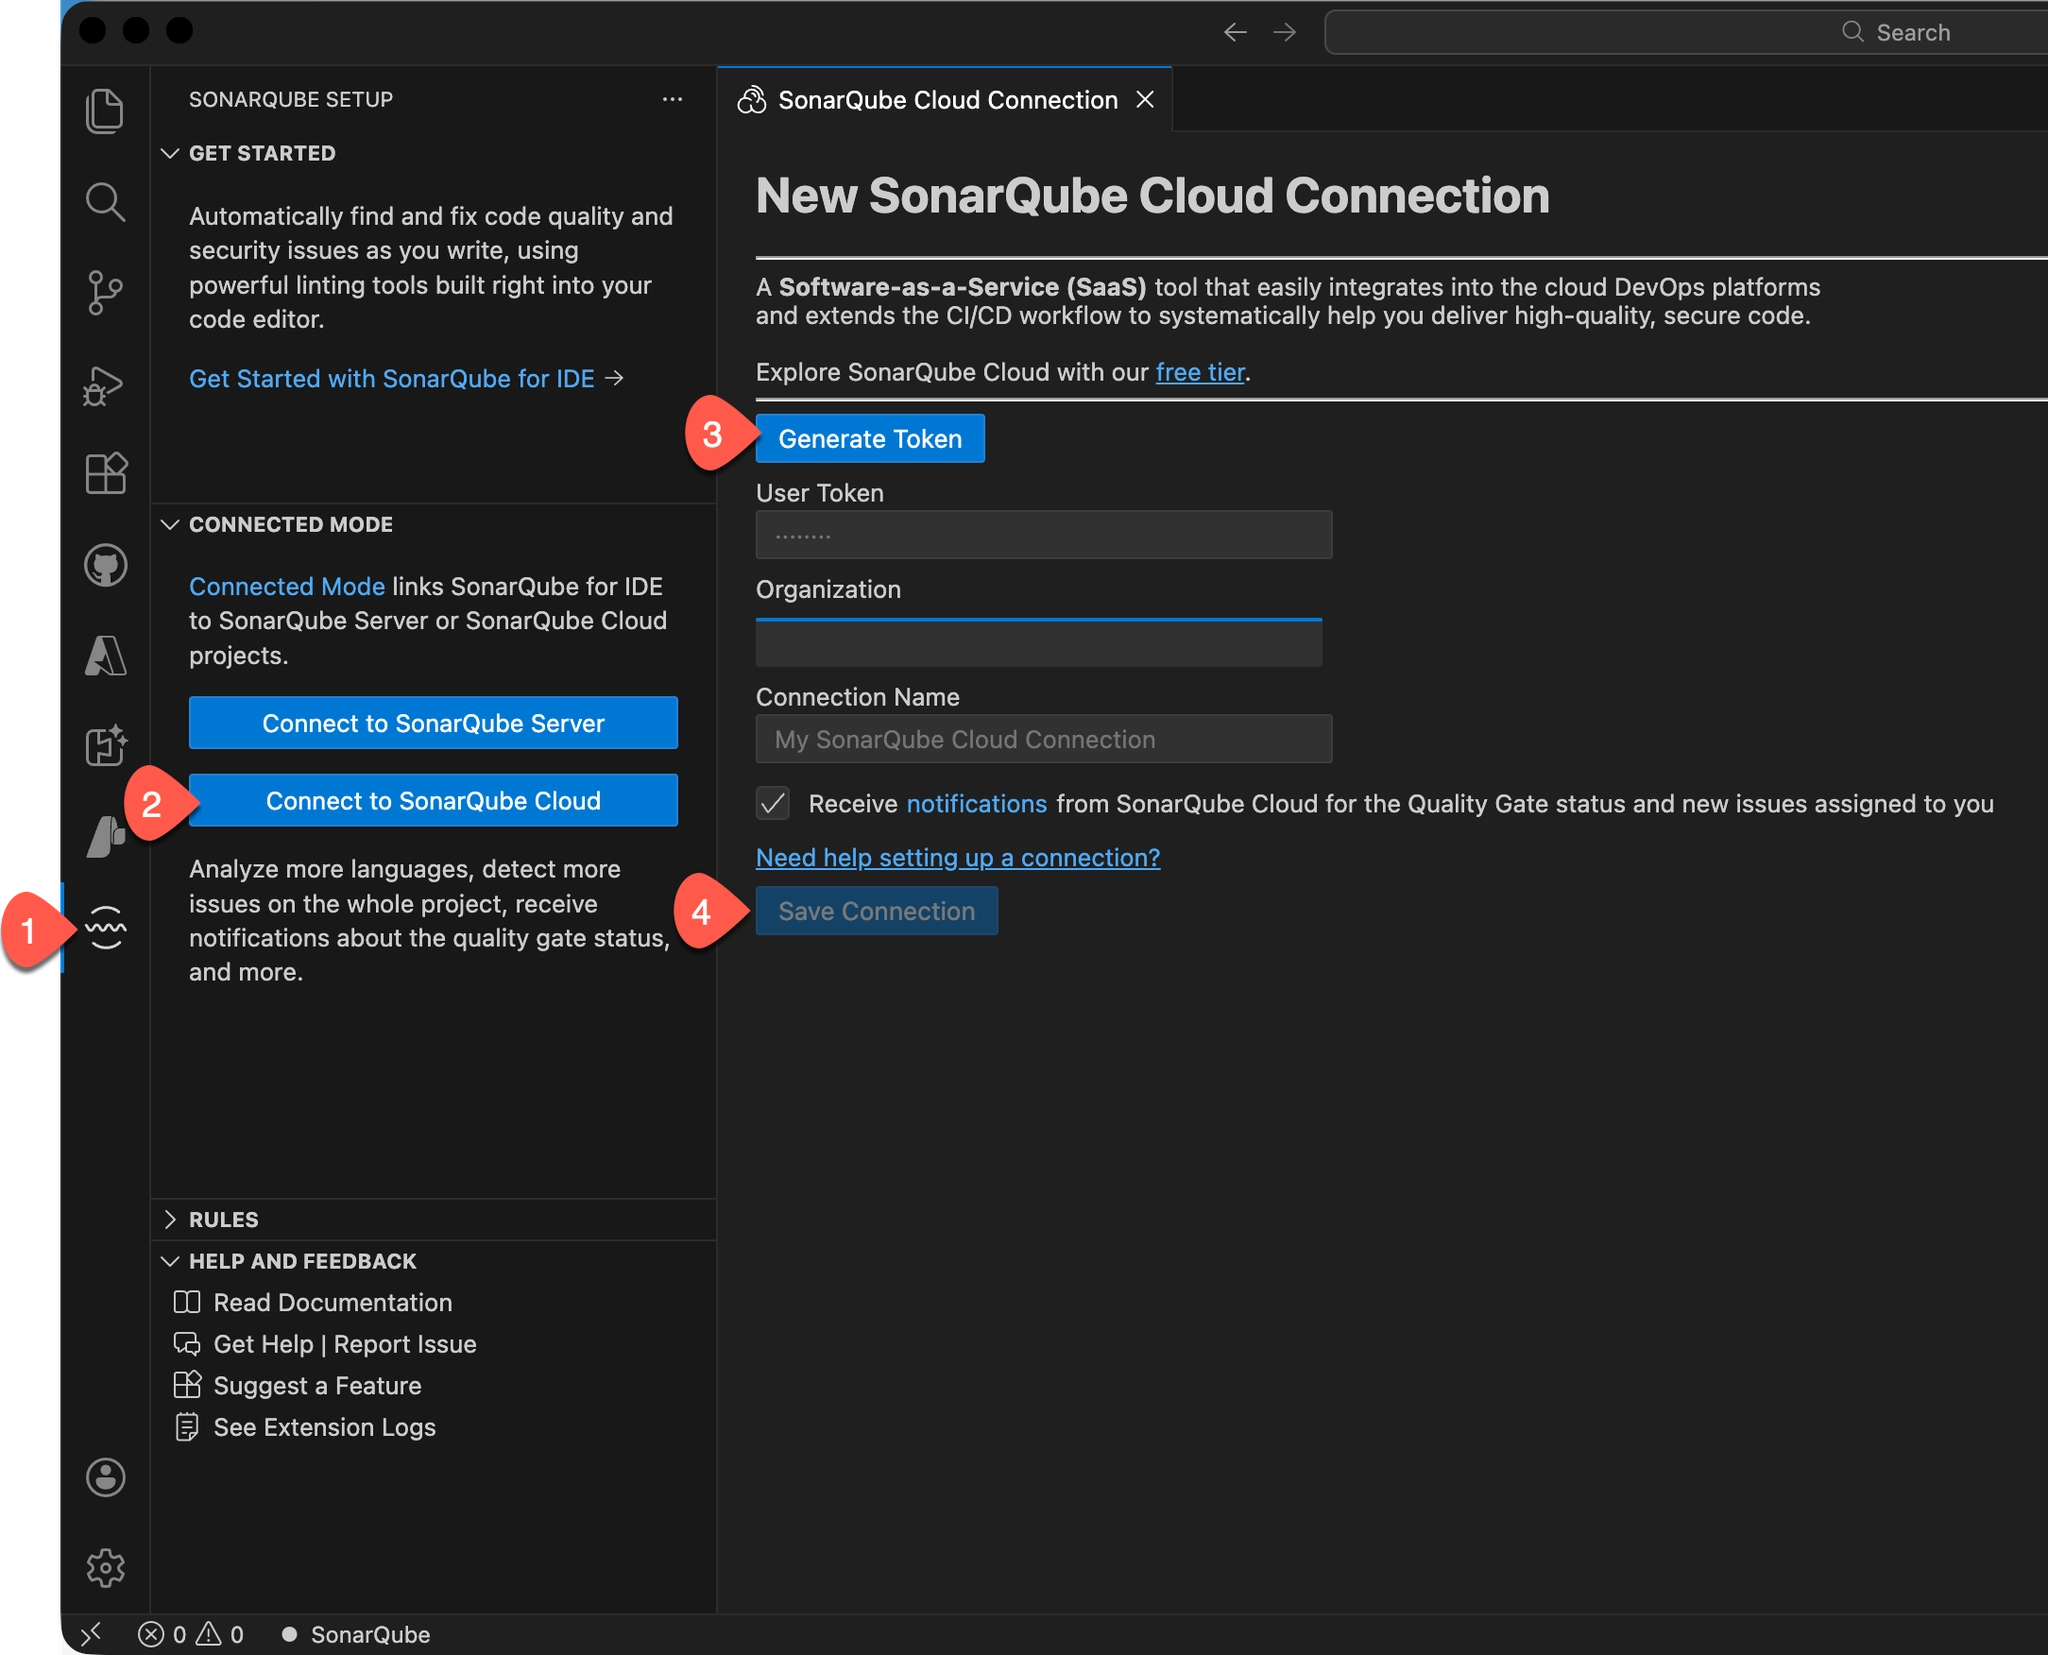
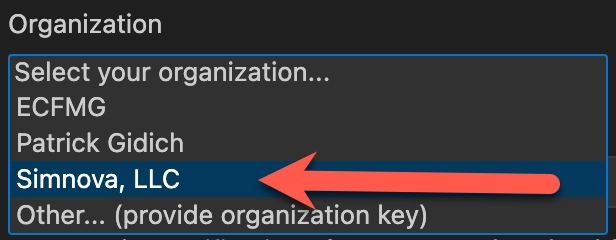
d. Add organization key to SonarQube Clooud for organization Simnova, LLC

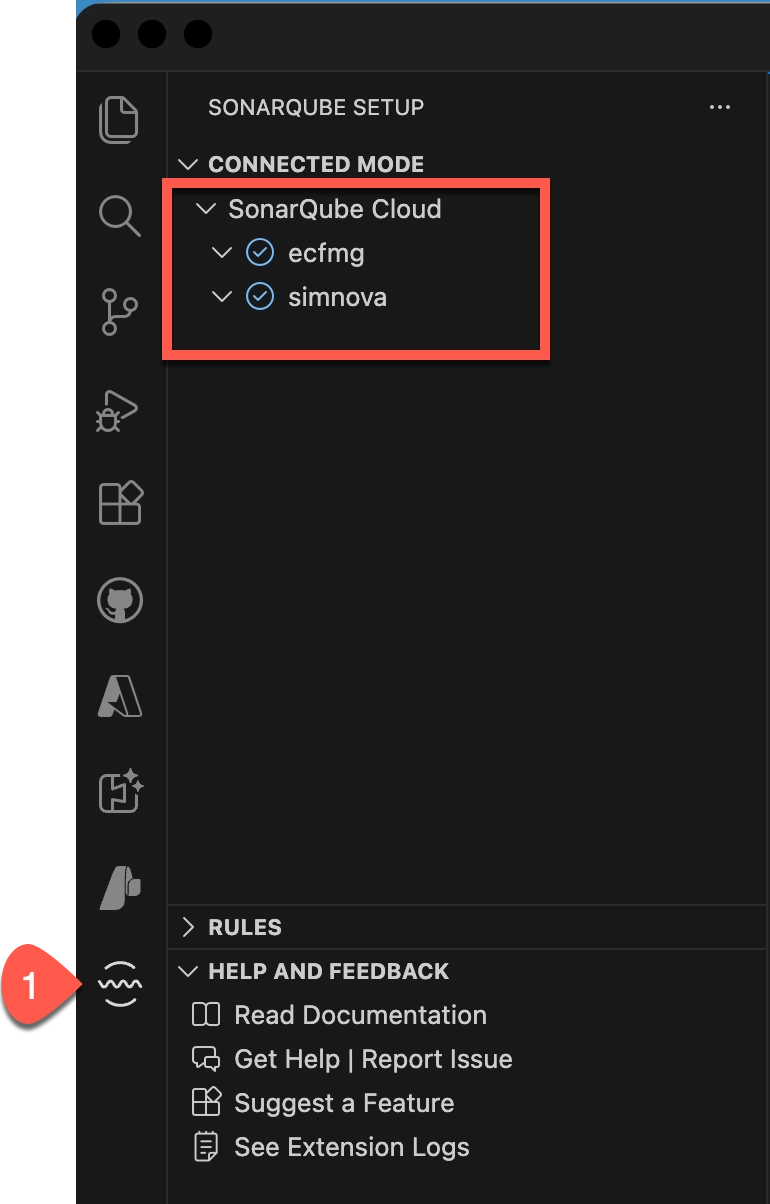
e. Confirm Configuration:
Right click on the vertical menubar and select “Move Primary Sidebar Right”
Right click on Sourcery on vertical menubar and select “Move to Secondary Sidebar” - login (choose login with GitHub)
7 - Maximize Screen Resolution
Go to settings → Displays → (Scroll down) → Click Advanced → Enable Show Resolutions as a list → Choose the highest resolution that your eyes can handle without excessive strain. (more code on the screen at once = higher productivity)
8 - Install VPN
(optional - only if directed to do so)-
Ensure OneDrive is synced
-
Copy this file to your desktop and open it
-
Launch the AnyConnect.pkg installer
-
Connect using IntealthOkta
a. You'll only use this to either submit a timesheet or access the ticketing system, other than that please do not connect to the VPN, be sure to have no other applications using the network when you're on the VPN (e.g. Spotify) and disconnect as soon as you're done.
i. username:
<<your username>>@ecfmg.orgii. password:
<<your password>>iii. choose Oktaverify push
- DO NOT CHOOSE ANY OPTIONS OTHER THAN VPN
a. If install goes sideways
i.
sudo pkgutil --forget com.cisco.pkg.anyconnect.vpnii. Should put into disk image - see here for info
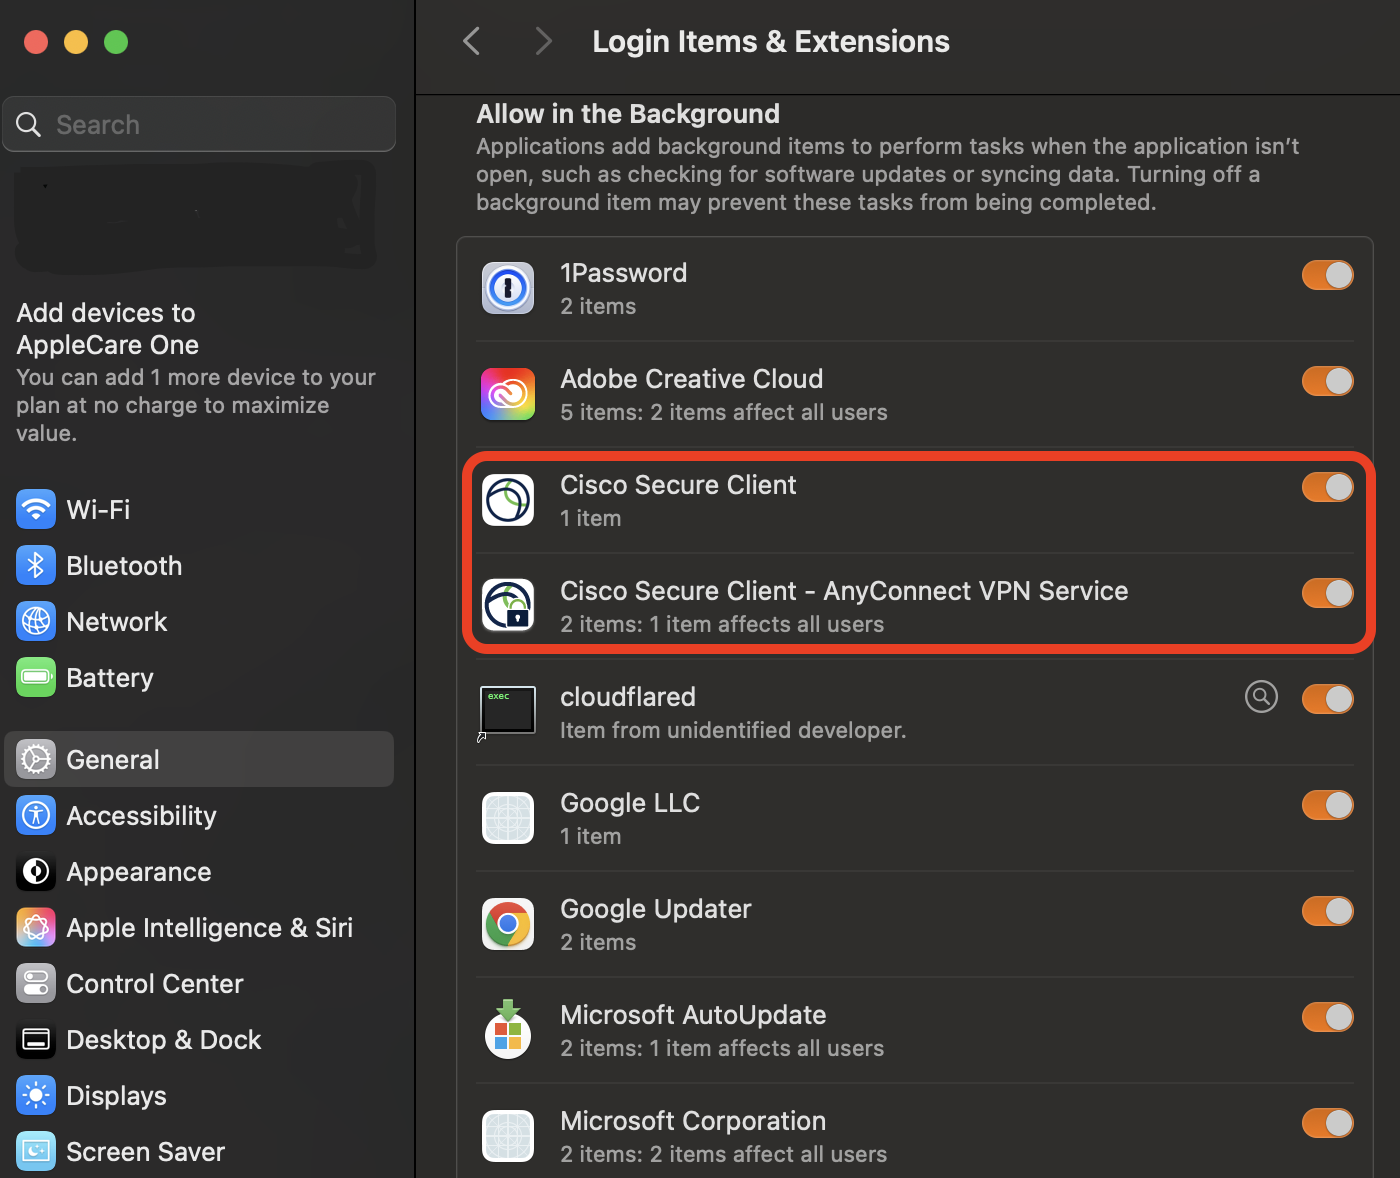
6. Please Enable AnyConnect VPN Service
System Settings -> General -> Login Items
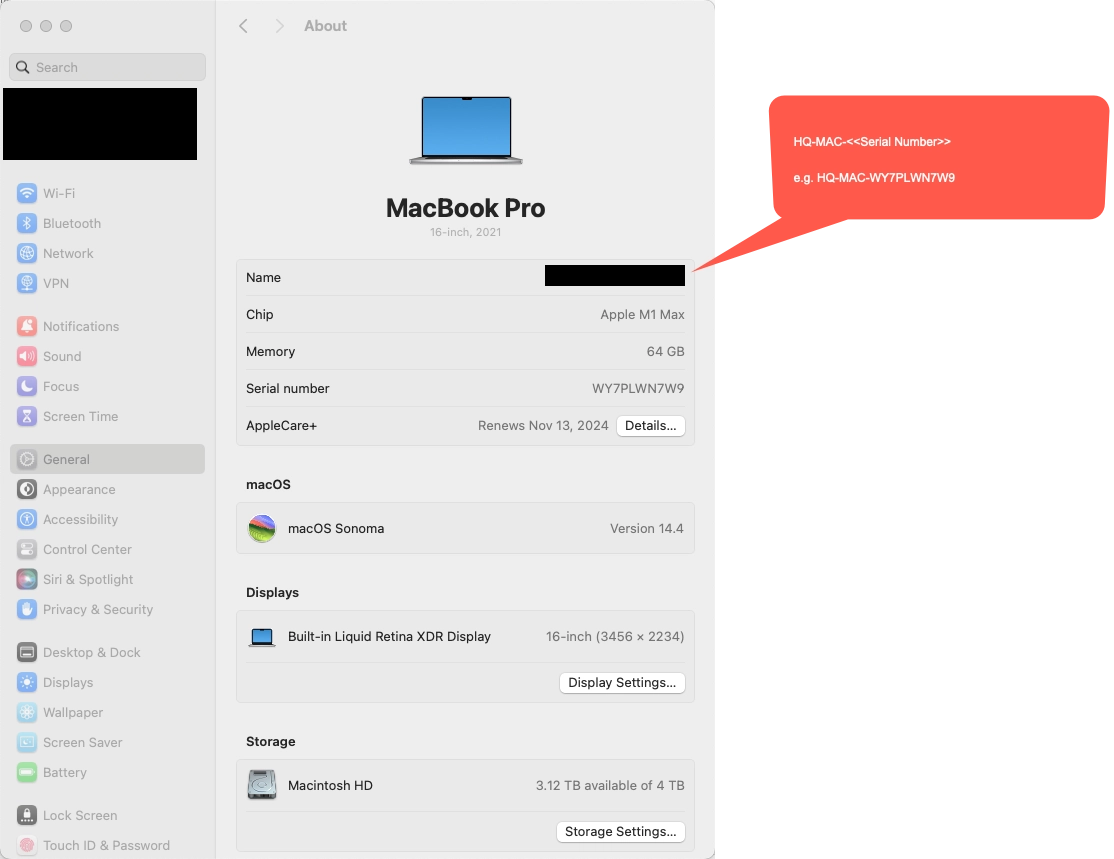
9 - Rename Macbook
(only required if brand new Macbook Pro is Provided by Intealth)
Click About This Mac
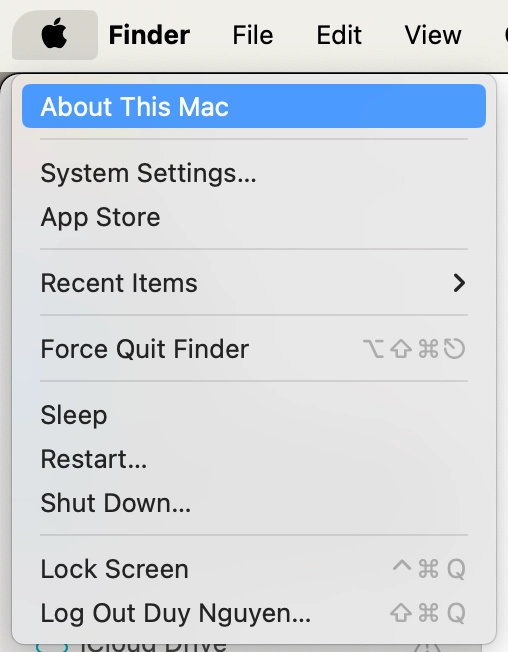
Click More Info
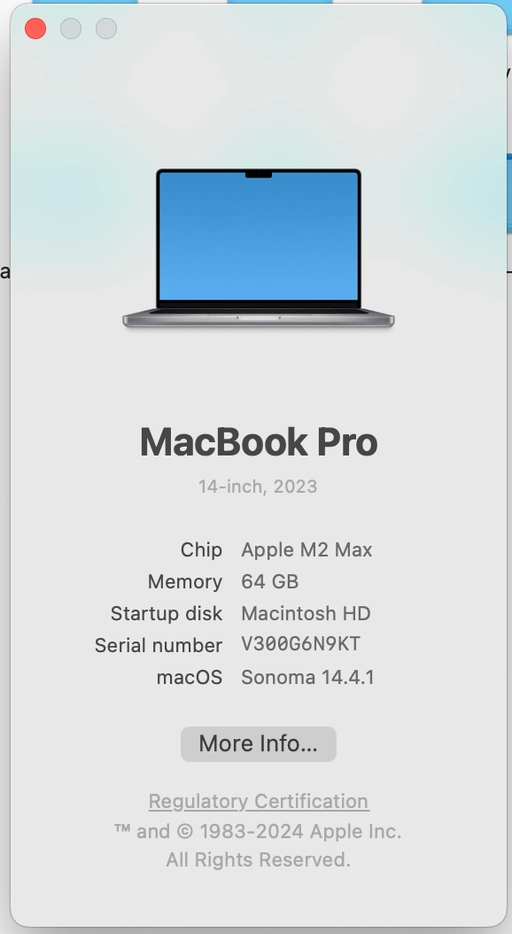
Select the Name and update it using this pattern: HQ-MAC-<serial number>